Table of Contents
Introduction: Why Headphone Covers Deserve Your Attention
Headphones are more than just audio devices—they’re daily companions for work, travel, and leisure. Yet one of the first things to show wear is often the most overlooked: the ear cushions. Over time, foam degrades, leatherette cracks, and comfort gives way to irritation. Replacing headphone covers isn’t just about aesthetics; it’s a cost-effective way to restore audio quality, hygiene, and comfort. This guide explores everything from identifying when to replace covers to step-by-step installation and choosing the perfect replacements for your headphones.
Signs It’s Time to Replace Your Headphone Covers
Visible Wear and Tear
Cracked, peeling, or flattened ear cushions are clear signs of aging. Foam disintegration not only looks unsightly but also allows sound leakage, reducing bass response and audio clarity.
Comfort and Hygiene Concerns
Worn cushions lose their plushness, causing ear fatigue during extended use. Dirty or stained covers harbor bacteria, leading to itching or infections—a problem exacerbated by sweat and skin oils.
Audio Performance Decline
Faded cushions fail to seal properly around the ear, letting sound escape and external noise creep in. This disrupts immersive listening and forces you to crank up the volume, risking hearing damage.
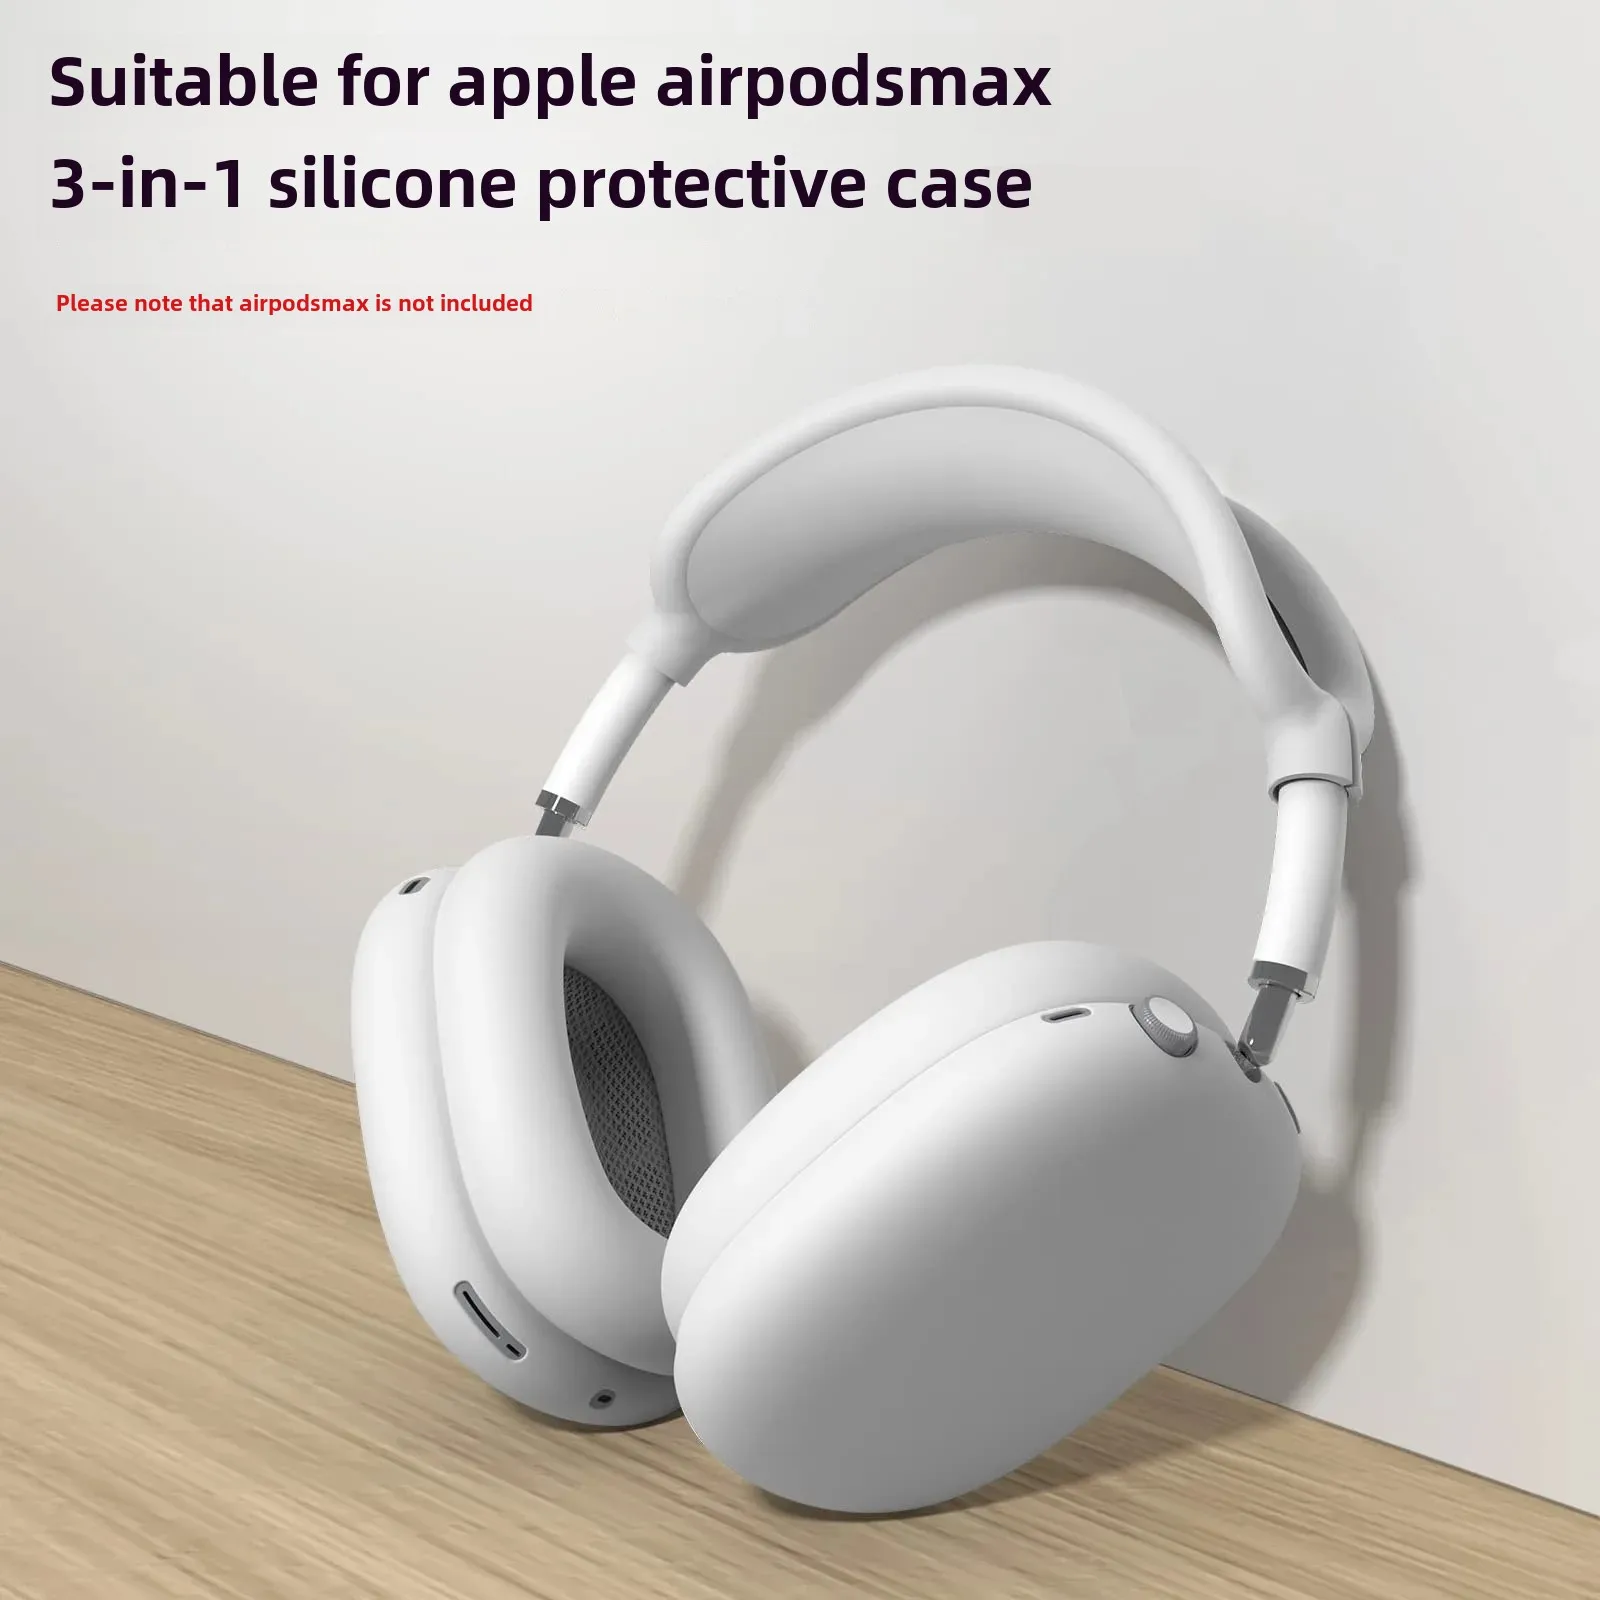
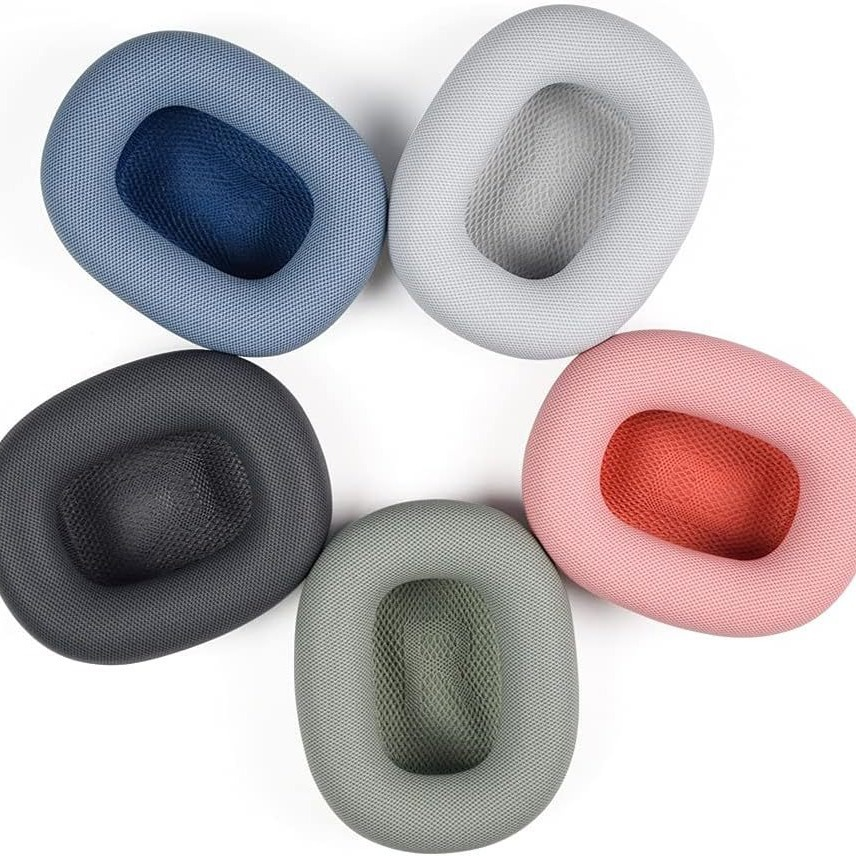
Types of Headphone Covers and Their Replacements
Foam vs. Leatherette: Material Matters
Foam cushions prioritize comfort and sound isolation but degrade faster. Leatherette (synthetic leather) offers durability and easier cleaning but may trap heat. Protein leather mimics genuine leather’s feel while improving breathability.
Over-Ear vs. On-Ear Designs
Over-ear headphones require larger, deeper cushions for full ear coverage. On-ear models need slimmer pads that balance comfort with pressure distribution. In-ear headphone replacements involve silicone or foam tips rather than full covers.
Specialized Covers for Studio or Gaming Headsets
Studio headphones often feature memory foam for extended sessions, while gaming headsets prioritize breathable materials to prevent overheating during marathons.
Step-by-Step: How to Replace Headphone Covers
Removing Old Cushions Without Damage
Start by gently prying the cushion away from the frame using a plastic spudger or your fingers. Avoid metal tools that could scratch the headphone shell. For glued cushions, apply heat with a hairdryer to soften the adhesive.
Cleaning the Headphone Frame
Once the old cover is off, wipe the frame with isopropyl alcohol to remove residue. Check for cracks or deformities that might affect the new cushion’s fit.
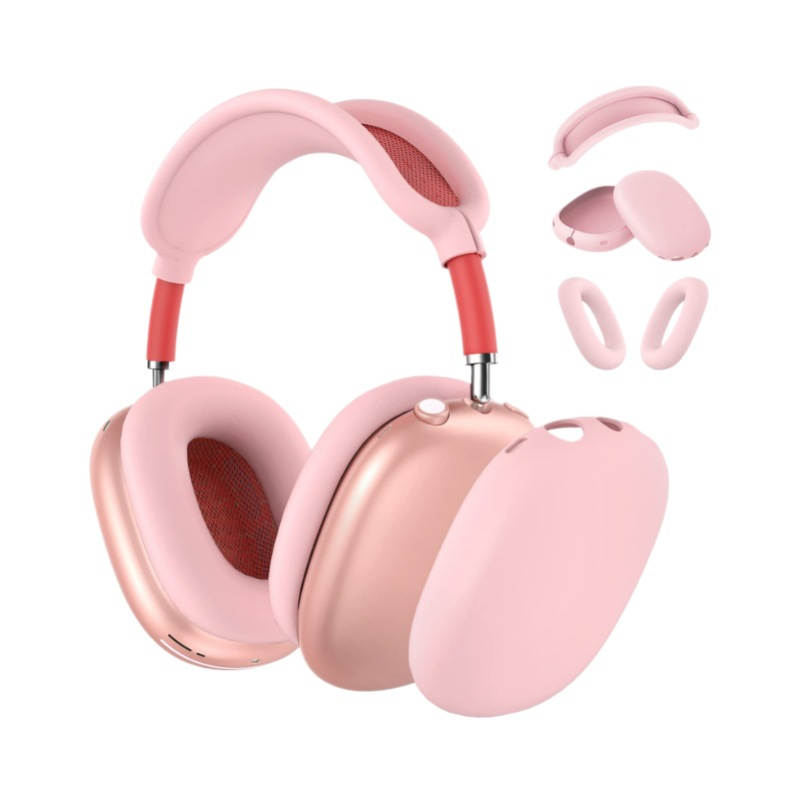
Installing New Covers: Tips for a Snug Fit
Align the replacement cushion’s opening with the driver housing and press evenly around the edges. For memory foam, let it expand naturally instead of forcing it into place.
Choosing the Right Replacement Covers
Compatibility: Matching Your Headphone Model
Always verify the make and model before purchasing. Some brands offer direct replacements, while universal covers require precise measurements of diameter, depth, and cutout shape.
Material Preferences for Your Use Case
Frequent travelers might prefer moisture-wicking protein leather, while audiophiles may opt for open-cell foam to preserve sound quality. Gamers should prioritize breathable, quick-drying fabrics.

Where to Buy Quality Replacements
Authorized dealers and the headphone manufacturer’s website ensure authenticity. For budget-friendly options, platforms like Amazon or eBay host reputable third-party sellers with customer reviews to guide your choice.
DIY vs. Professional Replacement: What’s Best for You?
When to Attempt a Home Installation
If your headphones have straightforward designs and you’re comfortable with basic tools, DIY replacement saves money and time.
Situations That Call for Professional Help
Complex builds like noise-canceling headphones with integrated electronics may require expert handling to avoid voiding warranties or causing damage.
Maintenance Tips to Extend the Life of Your New Covers
Regular Cleaning to Prevent Degradation
Wipe leatherette covers with a damp cloth weekly. Foam cushions benefit from occasional vacuuming to remove dust trapped in pores.
Proper Storage to Avoid Warping
Store headphones in a cool, dry place away from direct sunlight. Use protective cases to prevent accidental crushes or scratches.
Hygiene Practices for Shared Headphones
Rotate multiple pairs if possible, and sanitize covers after each use in shared environments.
The Environmental Impact of Replacing vs. Replacing Headphones
Sustainability Benefits of Extending Headphone Life
Replacing covers instead of entire headphones reduces electronic waste. Many manufacturers now offer recycling programs for old components.
Eco-Friendly Material Options
Look for covers made from recycled plastics or biodegradable foams. Some brands even plant trees for every purchase, offsetting environmental impact.
Conclusion: Breathe New Life into Your Headphones
Headphone cover replacement is a simple yet transformative upgrade that enhances comfort, audio quality, and hygiene. By understanding the signs of wear, choosing compatible replacements, and following proper installation techniques, you can keep your favorite headphones in top condition for years. Whether you’re a casual listener or a dedicated audiophile, this small investment pays off in performance and sustainability.
How to purchase: https://looperbuy.com/search?keywords=headphone+cover+replacement
Frequently Asked Questions (FAQs)
- What’s the easiest way to tell if my headphone covers need replacement? Inspect the cushions for visible cracks, flattened foam, or discomfort during use. If sound leaks or ear fatigue occurs, it’s time for a replacement.
- Can I wash leatherette headphone covers in a washing machine? No, machine washing risks warping or damaging the material. Instead, wipe with a damp cloth and mild soap, then air-dry away from direct heat.
- Do universal headphone covers fit all models? Universal covers work for common sizes but may not seal perfectly on niche or oversized headphones. Always check dimensions before buying.
- How long do replacement covers typically last? With proper care, leatherette covers last 6–12 months, while foam cushions endure 3–6 months of daily use. High-end materials like memory foam can last up to 2 years.
- Is it worth replacing covers on expensive headphones? Absolutely. Replacing covers preserves audio quality and resale value, often costing less than 20% of the original headphone price.
Hot Tags: Headphone cover replacement; Ear cushion upgrade; Headphone maintenance; Foam vs. leatherette pads; DIY headphone repair; Sustainable audio care; Headphone hygiene tips; Universal headphone covers; Extend headphone lifespan; Audio quality restoration